
CHEMICAL ANALYSIS
An AQA GCSE chemistry revision page on INSERT CONTENT HERE
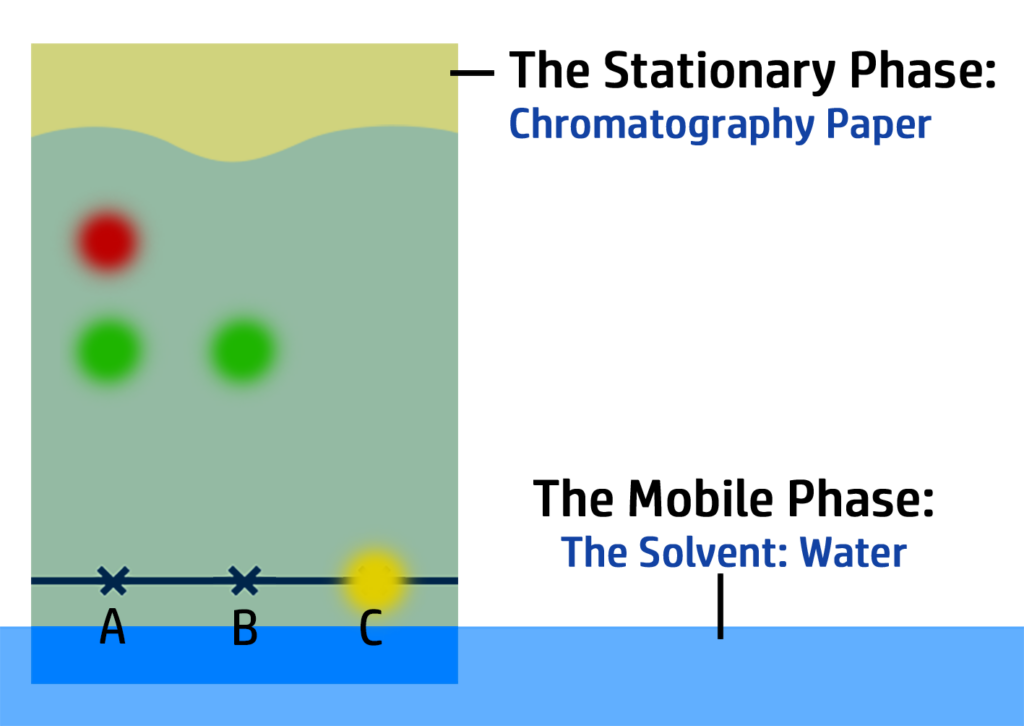
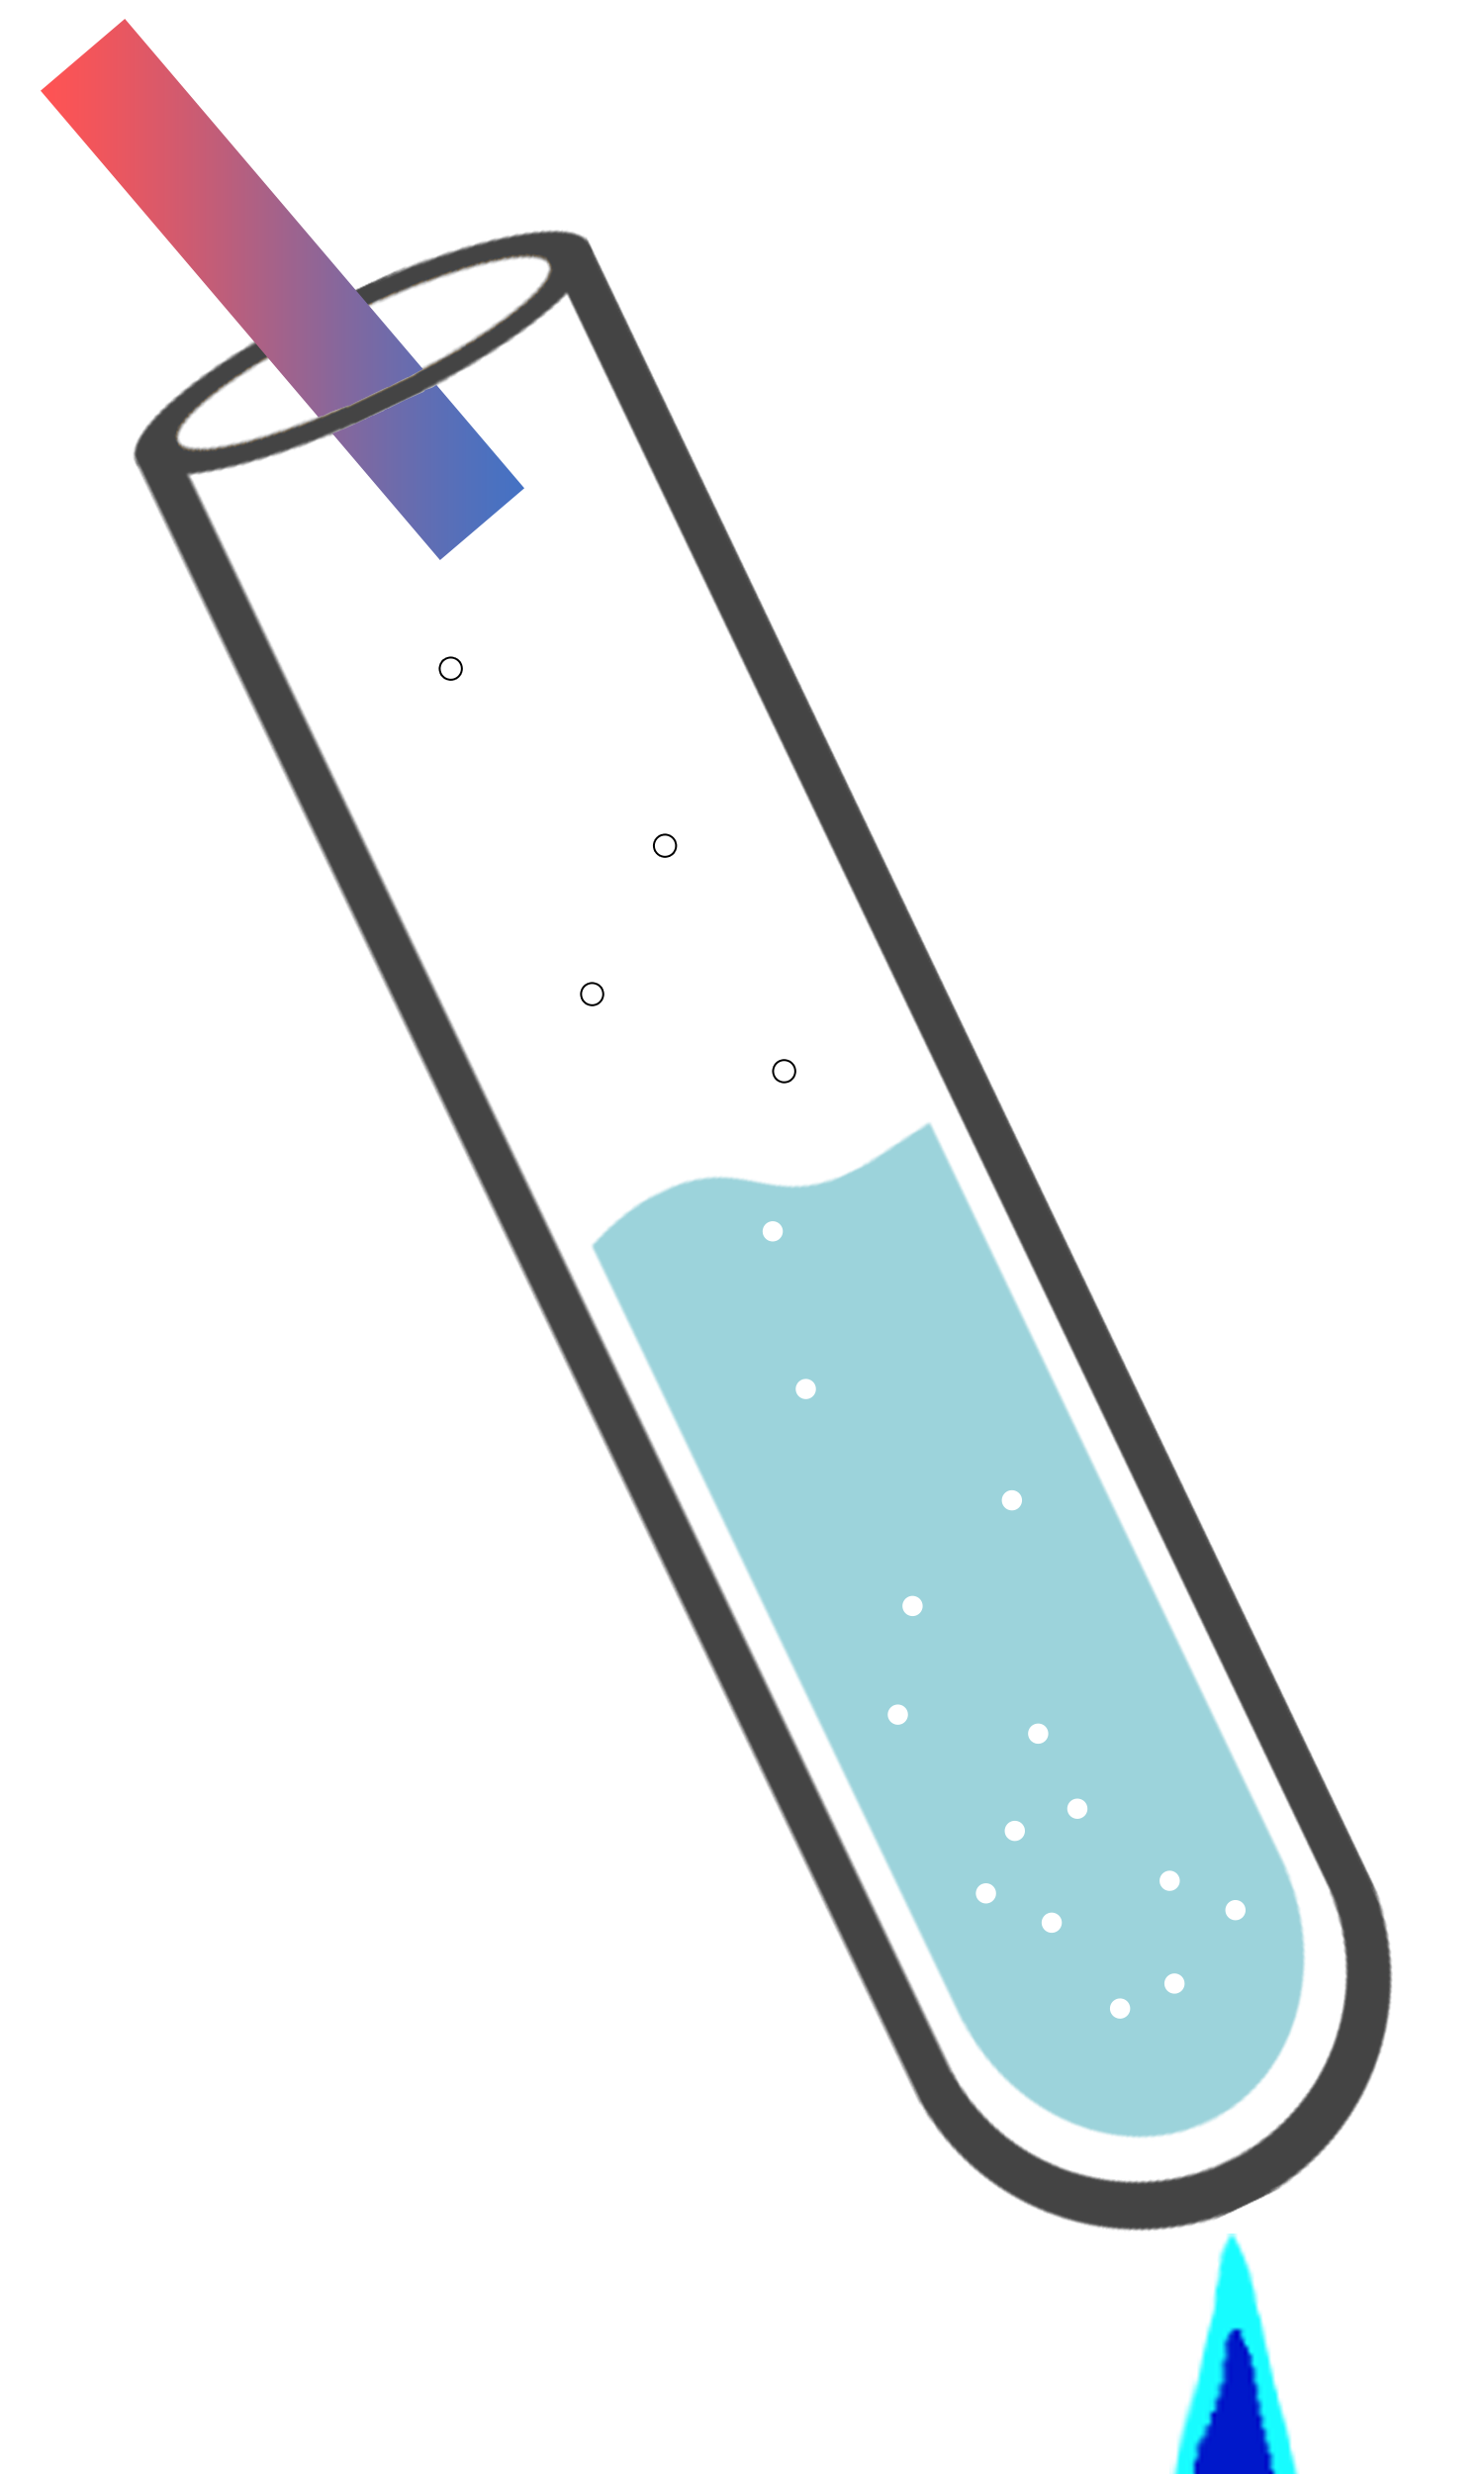
CH98: Describe how to prepare a chromatogram
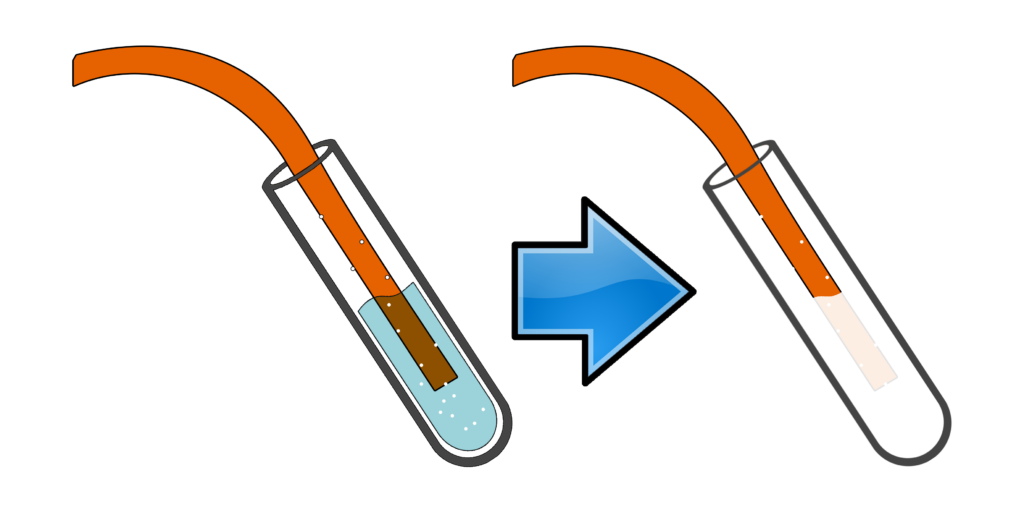
To prepare a chromatogram, you need to:
- Put a line in pencil (which is insoluble) on the bottom of the chromatogram.
- Add your sample(s) to the crosses (which should also be pencil).
- Once done, add the chromatogram to water making sure the ink does not touch the water. (If it does, the ink will dissolve and not move up the paper!)
- Wait until the water is close to the top of the chromatogram and remove. Mark the water line with a pencil.
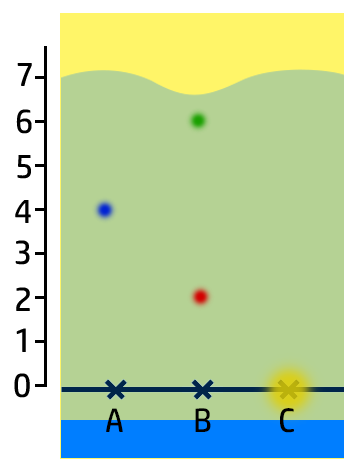
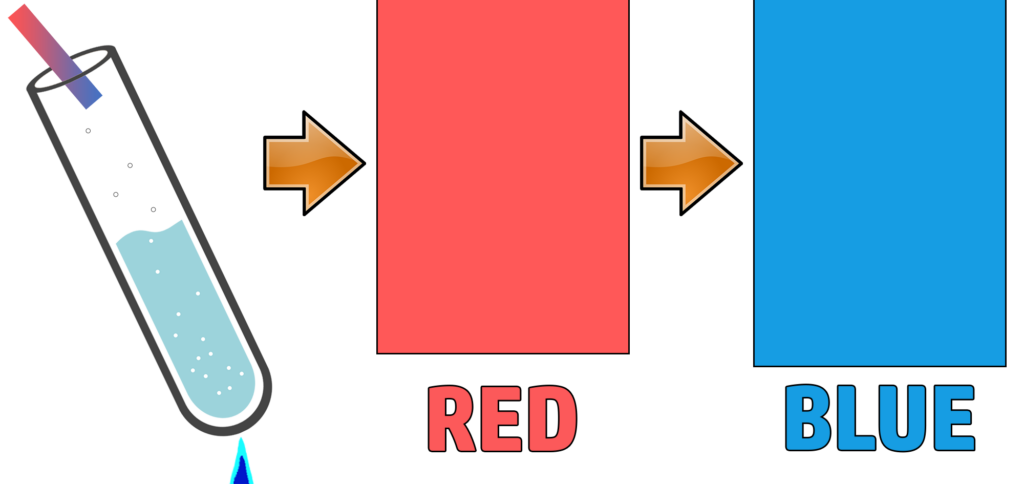
CH100: Analyse the results of a chromatogram
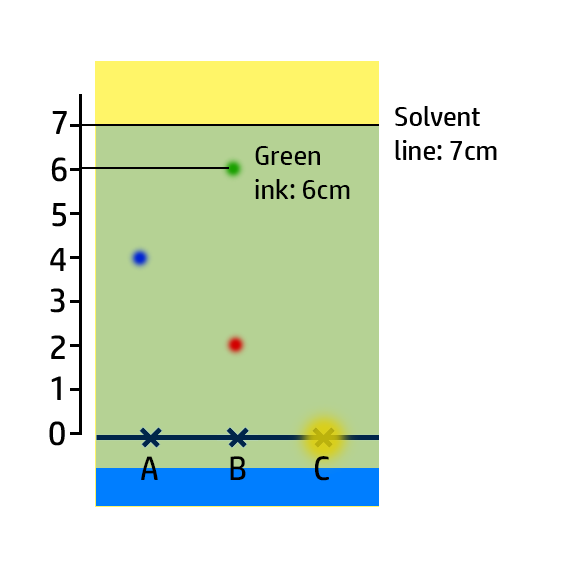
In the chromatogram on the right, you can see that:
- Substance A contains one colour – blue – so it is pure.
- Substance B has two colours – red and green – so it is a mixture.
- Substance C is insoluble in water.
You can also work out how soluble the colours are:
- The most soluble colour in this chromatogram is green. It has moved the furthest, so is the most soluble.
- Red is the least soluble (of the ones that have dissolved!)
- Yellow is insoluble.
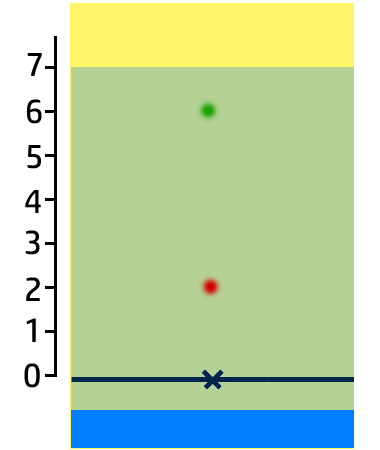
CH101: Calculate Retention Factor, Rf
The Retention Factor, Rf, is a measure of how soluble an ink is.

To calculate the retention factor, dissolve the distance the ink moves by the distance the water moves.
Example:
- For the green ink, it has moved 6cm, whilst the water has moved 7cm.
- Therefore 6cm / 7cm = 0.86.
Key Check: The retention factor will always be between 0 and 1!!
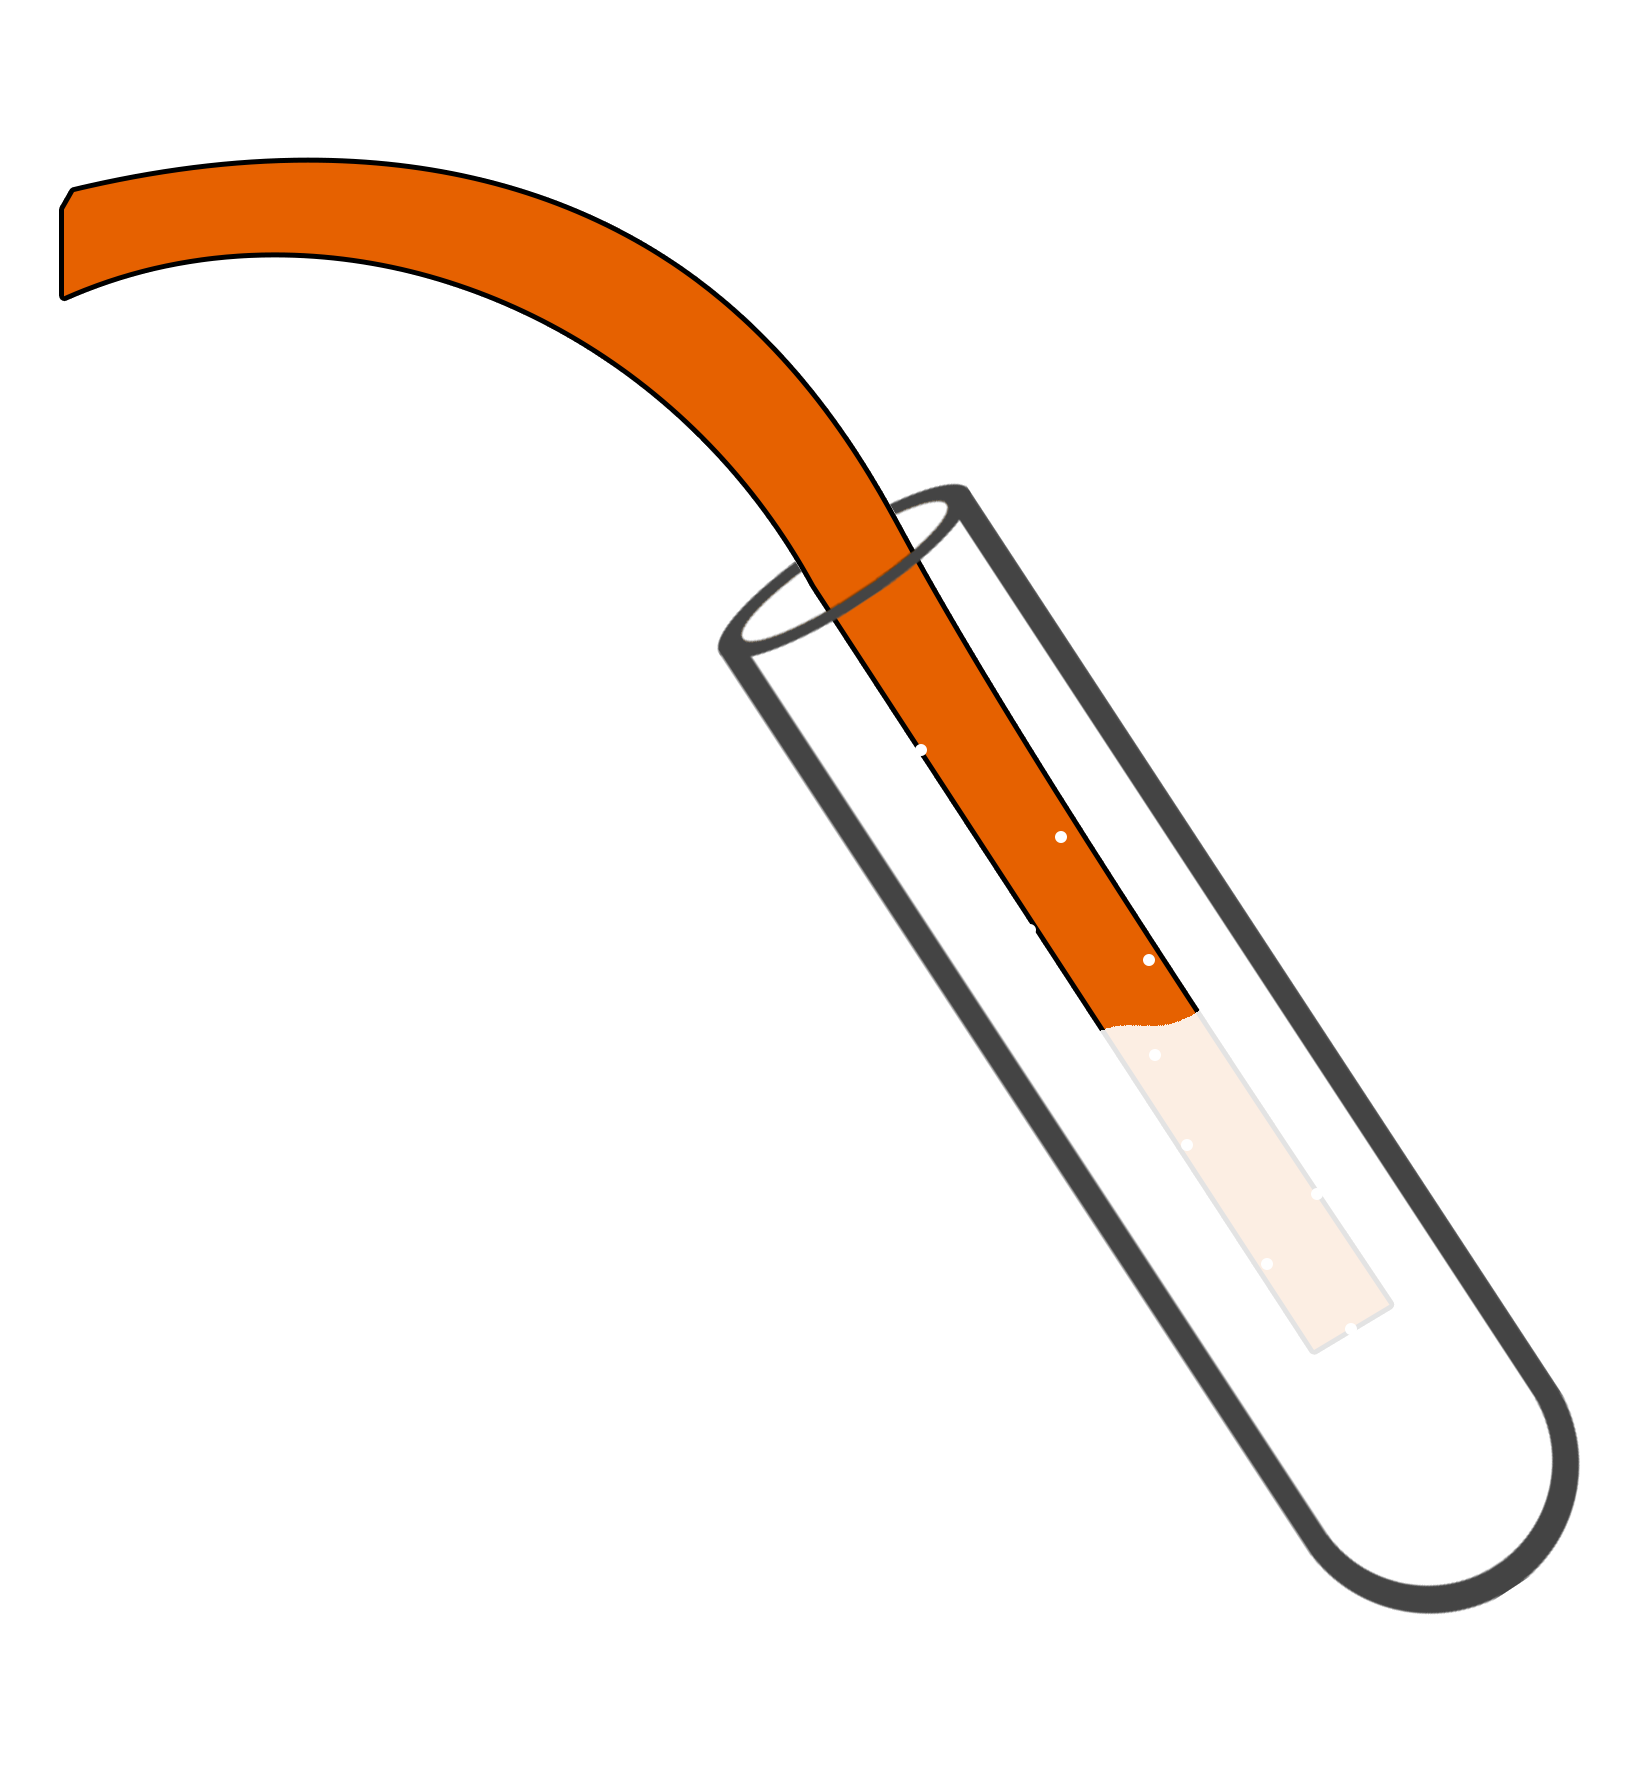
CH120: Describe the test for carbon dioxide
Carbon dioxide turns limewater cloudy.
Bubble the gas through limewater and if it goes cloudy/milky, carbon dioxide is present.
The carbon dioxide reacts with the limewater (calcium hydroxide) to form calcium carbonate – a white solid.
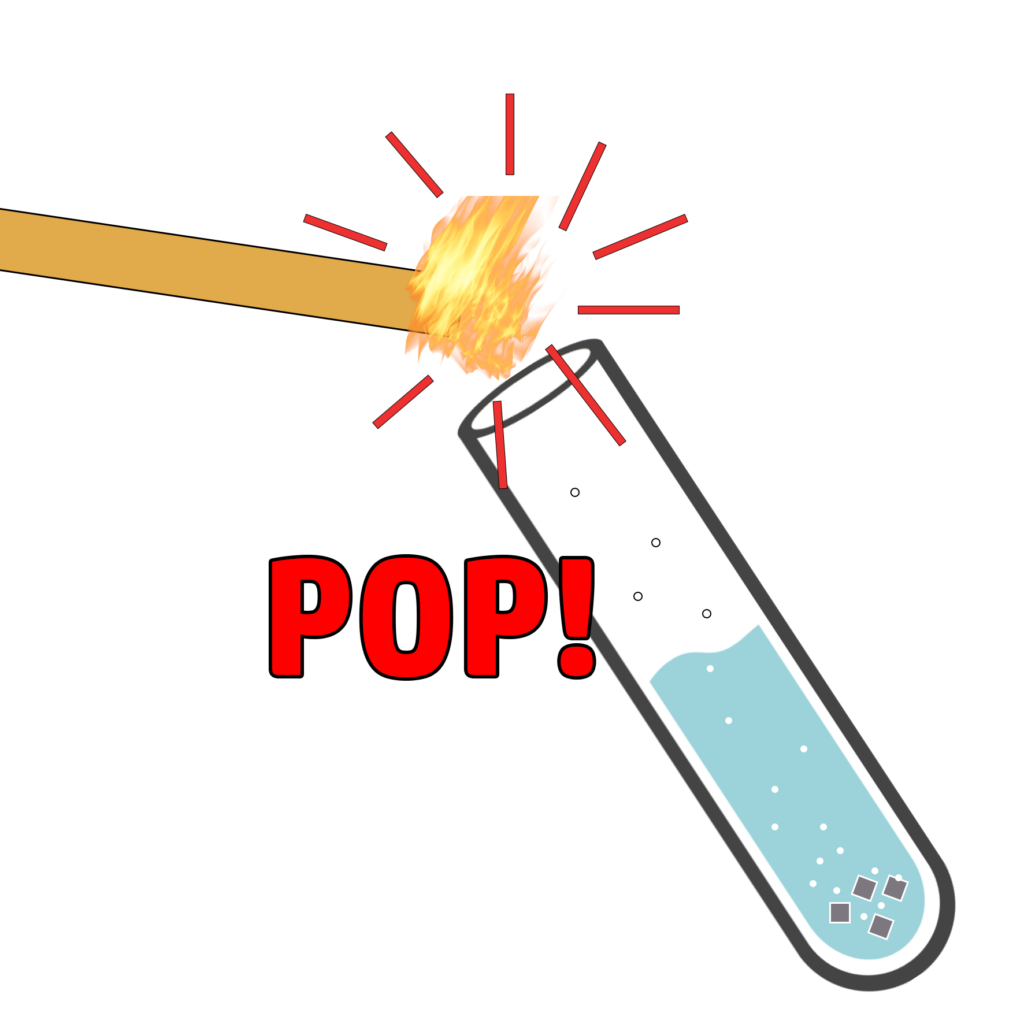
CH119: Describe the test for hydrogen
Hydrogen is a flammable gas.
If you take a lit splint and add it to a test tube containing hydrogen, you will hear a squeaky pop.
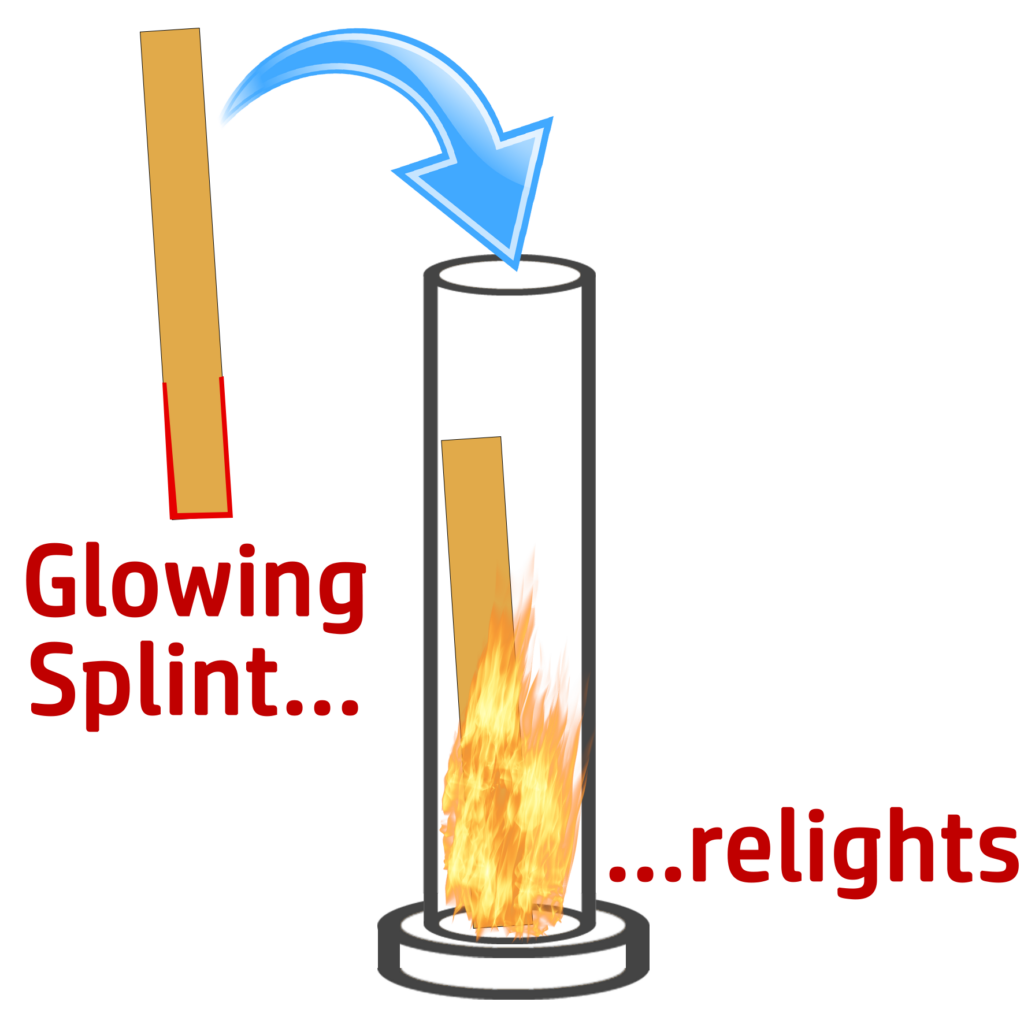
CH232: Describe the test for oxygen
Oxygen relights a glowing splint!
Take a splint, light it and then blow it out – make sure it is still glowing. Put the glowing splint into your oxygen and, if oxygen is present, the splint will relight!
Why? The oxygen accelerates combustion, so even the tiniest bit of energy can set the splint on fire again!
CH237: Describe why an ion test must be unique
When you carry out a test to identify which ions are present in an ionic compound, the result must be unique.
If it is not, you cannot draw a conclusion.
For example, if you added sodium hydroxide to an unknown solution and it gave a white precipitate it could be either aluminium or calcium present (see CH239). This is not unique, so you don’t know what ion is present. Therefore, you must find another way to test for that ion.
CH238: Identify the flame colours for different cations
Get a wire loop, add it to a flame and dip it in hydrochloric acid to clean it.
Add some of your sample to the cleaned wire loop and add it to your Bunsen Burner on a blue flame. Note the colour and use it to identify the ion present:
LITHIUM

RED FLAME
SODIUM

YELLOW FLAME
POTASSIUM

LILAC FLAME
CALCIUM

ORANGE-RED FLAME
COPPER

BLUE-GREEN FLAME
CH239: Identify the precipitate colours for different cations
Precipitation reactions involving sodium hydroxide often form coloured hydroxide precipitates. Dissolve your ionic substance, add your sodium hydroxide & note the colour:
IRON (II)
Fe2+

GREEN PRECIPITATE
IRON (III)
Fe3+

BROWN PRECIPITATE
COPPER (II)
Cu2+

BLUE PRECIPITATE
CALCIUM
Ca2+

WHITE PRECIPITATE
ALUMINIUM
Al3+

WHITE PRECIPITATE

Both aluminium and calcium give a white precipitate, meaning you can’t prove which is which.
To do that, add excess sodium hydroxide.
If the precipitate dissolves, aluminium is present.
If the precipitate doesn’t dissolve, it is calcium
CH240: Identify the test for ammonia
When sodium hydroxide is added to a solution containing ammonium ions, and heated, a gas (ammonia) is given off with a sharp smell.
A confirmatory test for ammonium is to add damp red litmus paper – it will go blue in the presence of ammonia.
CH241: Describe the test for carbonates, sulfates and halides
Test for carbonates, CO32-:

Add any acid.
Bubble the gas through limewater.
If limewater goes cloudy, you had a carbonate.
Example:
Balanced: CaCO3 + 2HCl → CaCl2 + H2O + CO2
Ionic: CO32-(aq) + 2H+ (aq) → H2O (l) + CO2 (g)
Test for sulfates, SO42-:
Add hydrochloric acid. This will acidify the solution and make sure there are no carbonate ions (no gas should form).
Add barium chloride. A precipitation reaction will occur and a white precipitate of barium sulfate will form.
Example:
Balanced: BaCl2 (aq) + MgSO4 (aq) → BaSO4 (s) + MgCl2 (aq)
Ionic: Ba2+ (aq) + SO42- (aq) → BaSO4 (s)
Test for halides, Cl–, Br– and I–:
Add nitric acid. This will acidify the solution and make sure there are no carbonate ions (no gas should form).
Add silver nitrate. A precipitation reaction will occur and a precipitate will form. The colour will tell you what precipitate you will get:
Test for Chloride, Cl–:
Adding nitric acid and silver nitrate will form a white precipitate of silver chloride.
Example:
Balanced: NaCl (aq) + AgNO3 (aq) → AgCl (s) + NaNO3 (aq)
Ionic: Cl– (aq) + Ag+ (aq) → AgCl (s)

Test for Bromide, Br–:
Adding nitric acid and silver nitrate will form a cream precipitate of silver bromide.
Example:
Balanced: NaBr (aq) + AgNO3 (aq) → AgBr (s) + NaNO3 (aq)
Ionic: Br– (aq) + Ag+ (aq) → AgBr (s)

Test for Iodide, I–:
Adding nitric acid and silver nitrate will form a yellow precipitate of silver iodide.
Example:
Balanced: NaI (aq) + AgNO3 (aq) → AgI (s) + NaNO3 (aq)
Ionic: I– (aq) + Ag+ (aq) → AgI (s)
CH242: Core Practical: Investigating Ions
You are presented with 3 ionic substances and asked to find out the names of the compounds. You carry out the following tests on each substance:
- Test 1: Flame test for cations: Add the substance to a wire loop and add to a blue Bunsen flame.
- Test 2: Precipitate test for cations: Add sodium hydroxide to the solution and note the colour of any precipitate.
- Test 3: Test for halides: Add nitric acid and a few drops of silver nitrate. Note any changes.
- Test 4: Test for sulfates: Add hydrochloric acid and a few drops of barium chloride. Note any changes.
- Test 5: Test for carbonates: Add any acid and bubble any gas through limewater.
The results of the test are below:
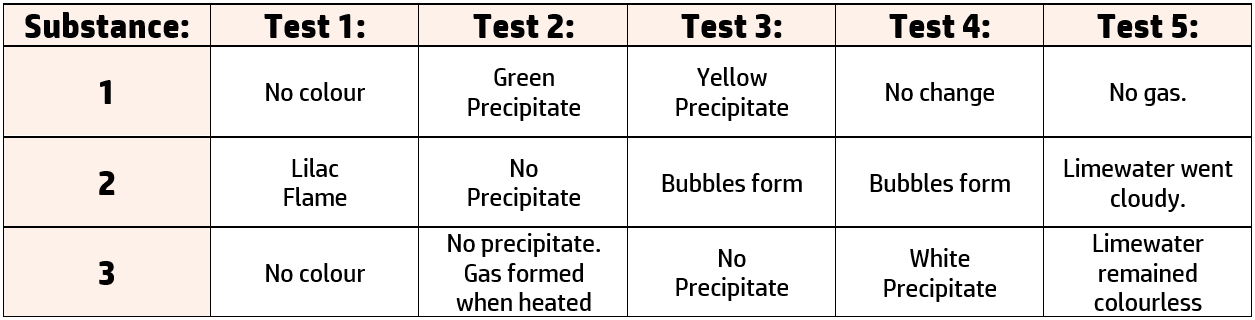
You are asked to name the substances using the results from these tests. To do this you need to know the tests:
Substance 1: Iron (II) chloride
Test 2 produced a green precipitate when sodium hydroxide was added. A green precipitate (CH239) tells us our cation is iron (II).
Test 3 produced a yellow precipitate when silver nitrate was added. This is the test for halides (CH241), and iodide ions are the only halides that turn yellow, so we have an iodide.
Name: Iron (II) iodide, FeI2
IRON (II)
IODIDE
Substance 2: Potassium carbonate
Test 1 produced a lilac flame (CH238), so straight away we know this is potassium.
A gas was formed – this could either be ammonia or carbon dioxide. Test five (CH241) shows that limewater went cloudy, so it must be a carbonate.
Name: Potassium carbonate, K2CO3
POTASSIUM
CARBONATE
Substance 3: Ammonium* sulfate
Test 1 and 2 did not produce a flame or a precipitate, but a gas was formed. Limewater didn’t go cloudy, so it is not a carbonate. This leaves us with ammonium – but this is not a confirmatory test. We would need to add the gas to damp red litmus paper (CH240) for a confirmatory test.
Test 4 produced a white precipitate. Lots of test produce white precipitates, so we have to be sure of the test. Here, barium chloride has been added, so we know this is the test for sulfates (CH241).
Name: Ammonium (?) sulfate, (NH4)2SO4
AMMONIUM (?)
SULFATE
CH243: Explain the advantages of instrumental analysis
It is better to use machines, such as flame photometry (see CH244), instead of flame tests because:
- They are more sensitive. (They can detect much smaller amounts)
- They are more accurate. (They give values closer to the true values)
- They give results faster.
CH244: Explain why flame photometry is more accurate than flame tests
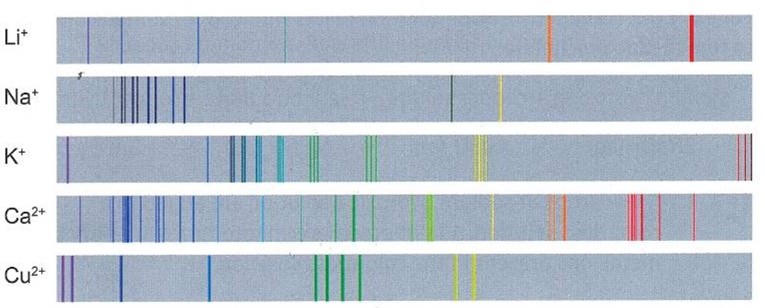
Flame photometers measure light intensity of flame colours and determines the concentration of a metal ion in solution.
This then produces an emission spectrum, such as the ones on the right. Each ion produces a unique spectrum, making them more accurate than flame tests.